

How to Achieve Smooth, Unbroken Glow Lines in Wall Panels
Achieve Smooth: When I first added illuminated lines to my wall panels, I expected a clean, continuous glow. Instead, I could see bright dots, darker gaps…
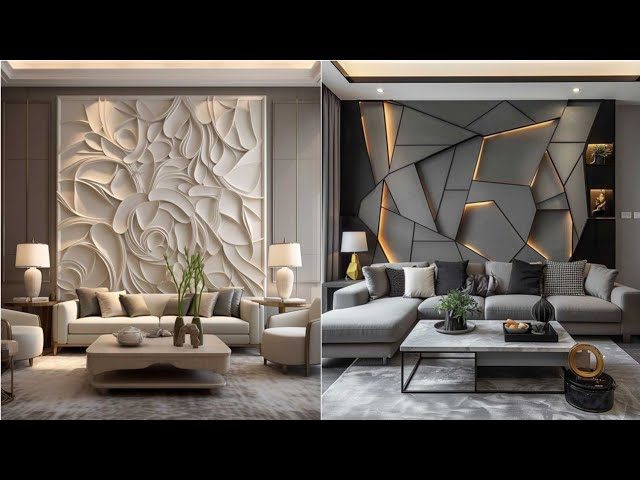
When I first added illuminated lines to my wall panels, I expected a clean, continuous glow. Instead, I could see bright dots, darker gaps and uneven sections along the design. The light looked attractive from a distance, but the flaws became obvious whenever I moved closer to the wall.
I initially blamed the strip itself. However, I soon realised that smooth wall-panel lighting depends on the complete system: the profile depth, diffuser, strip placement, electrical supply and installation accuracy. Once I treated the lighting as part of the panel design rather than a decorative addition, the glow became far more consistent.
Plan the Light Path
Before selecting any fitting, I mapped the exact route of the illuminated line. I decided where it would begin, how it would turn around corners and where the electrical connections could remain accessible.
This planning helped me avoid awkward breaks in the design. A line that ended suddenly or changed direction without enough space made the wall look unfinished, even when the light output was even.
I also considered the viewing angle. A glow line positioned at eye level exposed imperfections more easily than one installed above or behind a panel edge. By checking the design from the sofa, doorway and normal standing positions, I could identify where the strip or individual LED points might become visible.
Use a Proper Profile
My first attempt involved placing the strip inside a very shallow groove. Because the LEDs sat too close to the diffuser, each point remained visible and created a dotted effect.
I corrected this by using a deeper profile that provided enough distance between the strip and the diffuser. Wipro Garnet Profile Strip 12V gave me a structured way to integrate linear illumination into the wall-panel design. Wipro positions its LED strip solutions for architectural details and indirect lighting applications, where the source can blend into the surrounding interior.
The profile also kept the strip aligned. Without that support, even a slight bend or uneven attachment could change the distance between the LEDs and the diffuser, creating irregular patches of brightness.
Diffuse the Light
The diffuser had a major influence on the final appearance. A clear cover protected the strip but did little to conceal the individual light points. A frosted diffuser spread the output more effectively and transformed the separate LEDs into a softer visual line.
I made sure the diffuser ran continuously across the visible section of the panel. Small gaps between diffuser pieces created noticeable breaks whenever the light was switched on.
The diffuser reduced some brightness, so I did not compensate by selecting excessive output immediately. I first tested the strip, profile and cover together. This allowed me to judge the actual glow reaching the room rather than relying only on the strip’s stated output.
Avoid Long Power Runs
One section of my first installation appeared bright near the power connection and gradually became dimmer towards the far end. This happened because the strip had been used over a long distance without adequate power planning.
To correct it, I divided the wall design into practical sections and planned the supply points with an electrician. Wipro also offers a dedicated Profile Strip Driver for use with its profile-strip system. Matching the driver and strip requirements helped me create more stable illumination across the installation.
I avoided joining excessive lengths to a single supply without checking the electrical requirements. For longer wall features, feeding the design from more than one suitable point helped reduce visible differences between the beginning and end of the glow line.
Join Corners Carefully
Corners were the most difficult part of the wall-panel design. Bending the strip too sharply risked damaging it, while leaving a large gap created a dark section in the illuminated line.
I planned mitred profile joints and kept the strip transition as close and even as the installation allowed. Where a continuous turn was not practical, I used separate sections positioned carefully enough to make the visual gap less noticeable.
The panel grooves also had to meet precisely. Even a well-lit strip could not hide poor carpentry. This showed me that seamless lighting is partly a lighting challenge and partly a construction-detail challenge.
Balance the Room
The illuminated wall panels were meant to act as decorative lights, not as the only source of illumination. When I switched them on in an otherwise dark room, every small variation became more visible, and the wall looked overly dramatic.
I balanced the glow lines with broader Wipro ceiling lights. A softly distributed ceiling layer reduced the contrast between the illuminated panel and the surrounding room. This made the wall feature feel integrated rather than isolated.
In areas that required broad general lighting, a slim Wipro panel light provided even illumination without competing visually with the linear design. Wipro’s indoor range includes panel and ceiling-light options that can support the ambient layer while LED strips provide indirect depth.
Test Before Sealing
I tested the entire installation before the profiles and wall panels were permanently closed. This helped me identify dim joints, visible dots and inconsistent sections while corrections were still possible.
I viewed the lighting at different brightness levels and during both daylight and evening conditions. A line that appeared smooth in a bright room sometimes showed imperfections after dark.
I also ensured that the driver and electrical connections remained accessible. Concealing the components completely might have created a cleaner wall initially, but it would have made future inspection or replacement unnecessarily disruptive.
Let Every Line Flow Naturally
I achieved smooth, unbroken glow lines only after I stopped treating the strip as a standalone product. The Wipro profile strip created the illuminated line, but the profile depth, diffuser, power arrangement and panel workmanship determined how seamless that line appeared.
Wipro decorative lights, a slim panel light and balanced ceiling lights then helped the wall feature sit comfortably within the wider room.